How to Pack Fragile Items for Moving
Moving house sounds simple on paper. Boxes, tape, a van, done. In reality, it’s a bit of a mess — and fragile items are usually where things go wrong. Glasses crack. Plates chip. That one decorative piece you’ve had for years somehow doesn’t survive the journey. It’s frustrating, especially when it feels like bad luck. Truth is, it rarely is. Most damage happens because things weren’t packed properly in the first place.
Here’s the good news — packing fragile items isn’t complicated once you understand what actually protects them. It’s less about being overly careful and more about doing a few key things right. Get those sorted, and your stuff has a very good chance of arriving in one piece.
In this guide, you’ll learn exactly how to pack fragile items for moving house without the usual guesswork. We’ll cover what materials you actually need, the right way to pack step by step, and the common mistakes that quietly cause damage.
What You’ll Need to Pack Fragile Items Properly
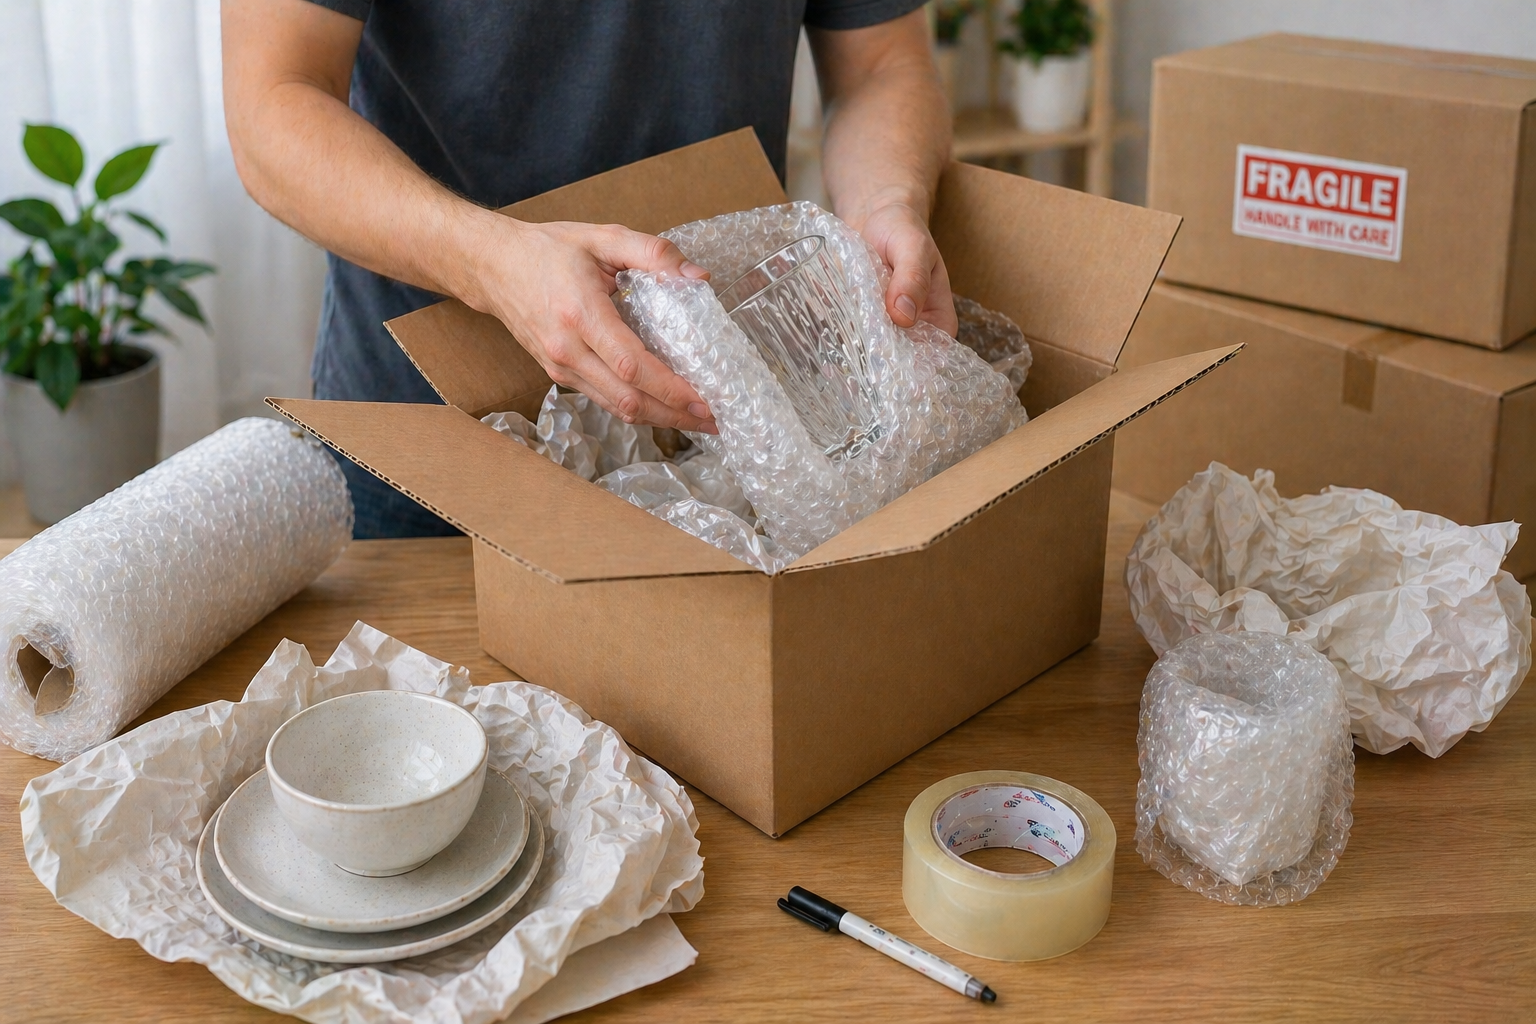
You don’t need anything fancy—but having the right packing materials is essential. This is exactly where many people cut corners… and where things often go wrong. Here’s what’s actually worth having on hand:
- Strong cardboard boxes – Go for double-walled boxes if you can. They hold their shape better and don’t buckle under weight, which matters more than people think once boxes start stacking up in a van.
- Bubble wrap – This is your main line of defence against impact. It absorbs shock properly, unlike paper alone. You don’t need to go overboard, but skipping it completely is asking for trouble.
- Packing paper – Clean, ink-free paper is ideal. Newspaper might seem like an easy option, but it can leave marks on glass, ceramics, and anything porous. Not worth the hassle.
- Strong packing tape – Cheap tape peels, snaps, or just doesn’t hold under pressure. Use proper packing tape and don’t be shy with it, especially on the bottom of boxes.
- Void fill (soft materials) – This is what stops movement inside the box. Things like foam peanuts, scrunched paper, towels, or even clothes work well. If it keeps items from shifting, it’s doing its job.
- Markers and labels – A simple “FRAGILE” label helps, but be realistic — it’s not a guarantee. It’s more about giving a heads-up than ensuring perfect handling. Adding “This Side Up” can help with certain items.
A quick tip — if you’re trying to save money, use what you already have. Towels, jumpers, and bedding can double up as padding. It’s actually one of the easiest ways to cut down on packing costs without risking damage.
How to Pack Fragile Items for Moving House – Step-by-Step Guide
This is where it all comes together. Get these steps right, and you’ll avoid most of the common breakages people deal with during a move.
Step 1: Prepare the Box Properly
Start with the box itself. Sounds basic, but it matters more than people think. Seal the bottom using strong packing tape, and don’t just run one strip across. Go over the seams a couple of times, especially if the box will carry weight. Once that’s done, add a layer of cushioning at the bottom — bubble wrap, scrunched paper, even a folded towel.
This base layer acts like a shock absorber. If the box is put down a bit too firmly (which it will be), that cushioning takes the hit instead of whatever’s inside.
Step 2: Wrap Each Item Individually
This is the step people rush — and it’s usually where things go wrong. Every fragile item should be wrapped on its own. No stacking plates together without protection, no “it’ll probably be fine” shortcuts. Use bubble wrap or packing paper and make sure the entire item is covered, especially corners and edges.
You don’t need to wrap things ridiculously tight, but they should feel secure. The goal is to stop direct contact between items and soften any knocks.
Step 3: Pack Heavier Items First
Once your items are wrapped, think about weight distribution. Place heavier items at the bottom of the box and lighter ones on top. It’s the same idea as packing a suitcase — you don’t want heavier objects crushing anything delicate underneath.
Also, try to keep things balanced. A lopsided box is more likely to tip or shift during the move, which defeats the point of careful packing.
Step 4: Fill All Empty Spaces
Empty space is the enemy here. If there’s room for items to move, they will move. And once they start shifting, damage isn’t far behind. Use packing paper, bubble wrap, or soft household items to fill every gap — sides, corners, and the top.
A good test is to gently shake the box. If you feel or hear movement, it needs more filling. When packed properly, everything should feel snug and stable.
Step 5: Seal and Label the Box Clearly
Once everything’s packed tightly, close the box and seal it properly with strong tape. Label it as “FRAGILE” on multiple sides, not just the top. If the contents need to stay upright — like glasses or certain electronics — add “This Side Up” arrows as well.
That said, don’t rely on labels alone. Not everyone handling the box will treat it carefully. The real protection comes from how well you packed it in the first place.
How to Pack Glasses for Moving
Glasses are one of those things that seem easy to pack… until you open the box at the other end and find a few casualties. They’re thin, awkwardly shaped, and don’t handle movement well. The trick isn’t just wrapping them — it’s how you place and support them in the box. Here’s how to do it properly.
Step 1: Start with a Proper Box Setup
Use a strong, preferably double-walled box. Before anything goes in, reinforce the bottom with tape and add a soft base layer — bubble wrap or scrunched packing paper works well. If you’ve got a box with dividers (often called a glass pack), even better. It keeps each glass separated, which massively reduces the risk of knocking.
Step 2: Wrap Each Glass Individually
Don’t bundle glasses together. Each one needs its own protection. Lay the glass on packing paper or bubble wrap, roll it up, and tuck in the ends so it’s fully covered. Pay extra attention to the rim and the base — those are the weakest points.
For more delicate glasses like wine glasses, use an extra layer around the stem. That’s usually the first thing to snap.
Step 3: Stuff the Inside of the Glass
This is a simple trick that makes a big difference. Gently fill the inside of each glass with scrunched packing paper. It helps the glass keep its shape and adds internal support, which reduces the chance of cracking under pressure.
Step 4: Pack Glasses Upright (Not Flat)
This is where a lot of people get it wrong. Glasses should always be packed standing upright, just like they would sit in a cupboard. It might feel safer to lay them on their side, but that actually puts more stress on the glass.
Place them in the box one by one, keeping them snug but not forced together.
Step 5: Fill Gaps and Keep Everything Tight
Once the glasses are in, fill any empty spaces around them with packing paper, bubble wrap, or even soft items like tea towels. You’re aiming for zero movement. Give the box a gentle shake — if anything shifts, add more padding.
Step 6: Light Top Layer and Careful Sealing
Add a final cushioning layer on top before sealing the box. Then tape it securely. Mark the box as “FRAGILE” and “This Side Up”, but don’t rely on that alone. Assume it’ll still be moved around more than you’d like.
Done right, glasses are actually quite manageable to move. It’s just about being a bit more deliberate with how you wrap and place them.
How to Pack Plates for Moving House
Plates are heavier than they look, and they don’t forgive sloppy packing. One wrong move — too much pressure, a bit of shifting — and you end up with chips or cracks. The good news is they’re actually quite easy to protect if you pack them the right way.
Step 1: Reinforce the Box and Add a Cushion Base
Start with a sturdy box. Plates get heavy quickly, so this isn’t the place for a flimsy one. Tape the bottom securely, then add a thick layer of cushioning — bubble wrap, scrunched packing paper, or even a folded towel. This base layer absorbs impact when the box is set down, which happens more roughly than people admit.
Step 2: Wrap Each Plate Individually
It’s tempting to stack and wrap them together to save time. Don’t. Lay a plate on packing paper, wrap it fully, then repeat for each one. You can stack a few once they’re individually wrapped, but never leave them touching directly. If you’ve got bubble wrap, use it for an extra outer layer around small stacks (3–4 plates max). It adds that bit of shock protection that paper alone doesn’t give.
Step 3: Pack Plates Vertically (This Is Key)
This is the part most people get wrong. Plates should be packed on their edge, like records or files — not stacked flat. When they’re vertical, pressure is distributed across the surface instead of directly down onto them, which makes them far less likely to crack. It might feel odd, but it works.
Step 4: Keep Stacks Small and Balanced
Even when wrapped, don’t create massive stacks. Stick to a few plates per group and place them tightly next to each other in the box. Keep the weight balanced so one side isn’t heavier than the other. A lopsided box shifts more during the move, and that’s where problems start.
Step 5: Fill Every Gap
Any empty space is a problem waiting to happen. Use packing paper, bubble wrap, or soft kitchen items like tea towels to fill gaps around and between the plates. The goal is simple — nothing moves when the box does. Give it a light shake test. If you feel movement, it’s not ready yet.
Step 6: Add a Top Cushion and Seal Properly
Before closing the box, add a final soft layer on top. This protects the plates from any pressure if something gets stacked above. Seal the box well with strong tape, and label it clearly as “FRAGILE” and “Kitchen”. It won’t guarantee careful handling, but it helps.
Pack them properly, and plates are actually one of the easier fragile items to move. Rush it, and they’re usually the first things to go.
How to Pack Electronics Safely for Moving House
Electronics are a different beast altogether. They’re not just fragile — they’re expensive, sensitive, and a lot less forgiving if something goes wrong. One knock might not show damage straight away, but it can cause issues later. That’s what makes packing them properly worth the effort.
Step 1: Back Up and Prepare Before Packing
Before you even touch a cable, take a few minutes to back everything up. Laptops, desktops, external drives — anything with important data. It’s one of those things people skip because they’re in a rush, and then regret later.
Once that’s done, unplug everything and take photos of cable setups if needed. Sounds small, but it makes reassembly much easier when you’re tired and surrounded by boxes.
Step 2: Use Original Boxes If You Still Have Them
If you’ve kept the original packaging, now’s the time to use it. Those boxes were designed specifically for that device, with the right shape and padding. TVs, monitors, and gaming consoles are much safer in their original packaging than anything you can improvise. If you don’t have them, no problem — you’ll just need to be a bit more careful with padding.
Step 3: Wrap Screens and Sensitive Surfaces Properly
Screens are the most vulnerable part. Use a soft layer first — like a microfibre cloth or packing paper — directly against the screen. Then add bubble wrap over the top. This stops scratches as well as impact damage. Avoid putting tape directly on screens or glossy surfaces. It can leave marks or even damage the finish.
Step 4: Protect and Organise Cables
Cables turn into a mess quickly if you don’t deal with them properly. Coil them neatly, secure them with a tie or a bit of tape, and keep them with the device they belong to. You can place them in a small bag or wrap them separately.
It saves you digging through boxes later trying to figure out what goes where.
Step 5: Pack with Padding — No Empty Space
Place the wrapped device in a sturdy box and surround it with cushioning on all sides. Bubble wrap, packing paper, foam, even towels — whatever you’ve got. The key is to keep the item from moving at all. Electronics don’t handle internal movement well, even small shifts can cause damage.
For smaller devices, you can double-box them — one padded box inside a larger padded box. It’s extra effort, but worth it for high-value items.
Step 6: Keep Electronics Upright and Clearly Labelled
Whenever possible, keep items like TVs and monitors upright during the move. Label the box clearly, but again — don’t rely on that alone. If something is particularly valuable or fragile, it’s often safer to transport it yourself rather than loading it into the moving van.
Common Mistakes When Packing Fragile Items
This is where most people slip up. Not because they don’t care, but because they assume a bit of wrapping and a “FRAGILE” label will do the job. It won’t. These are the mistakes that quietly cause most of the damage.
- Leaving empty space in the box – If items can move, they will move. Even small shifts during the drive can lead to chips or cracks. A properly packed box should feel tight and stable, not loose.
- Using weak or worn-out boxes – Old boxes lose their strength, especially if they’ve been used before. Once weight is added and boxes are stacked, they can buckle or collapse without much warning.
- Not wrapping items individually – Letting fragile items touch each other is asking for trouble. It only takes a bit of movement for them to knock together and cause damage.
- Overpacking the box – Trying to fit too much in one box puts pressure on everything inside, particularly at the bottom. Heavier isn’t better here — it just increases the risk of cracks.
- Relying too much on “FRAGILE” labels – It helps, but it’s not a guarantee. Boxes still get stacked, shifted, and handled quickly. The real protection comes from how well things are packed inside.
- Using the wrong materials – Newspaper alone, thin plastic, or random scraps don’t provide proper protection. You need materials that actually absorb impact, not just fill space.
- Packing plates and glasses the wrong way – Flat-stacked plates and sideways glasses are far more likely to break. Positioning matters more than most people realise.
- Rushing the packing process – This is probably the biggest one. When you rush, you skip steps, cut corners, and that’s when things start going wrong.
Extra Tips to Keep Fragile Items Safe During the Move
Even if you’ve packed everything well, the move itself can still trip you up. A few small decisions on moving day make a bigger difference than people expect.
- Keep fragile boxes separate in the van – Try to group them together rather than mixing them in with everything else. It makes it easier to control how they’re handled and reduces the chance of heavy boxes ending up on top.
- Don’t stack heavy items on top – Sounds obvious, but it happens all the time in a rush. Even well-packed boxes can only take so much weight before something gives.
- Transport your most valuable items yourself – If something is expensive, sentimental, or hard to replace, it’s usually safer in your own car. You’ve got full control over how it’s handled.
- Avoid rushing the loading and unloading – This is when most damage happens. People are tired, trying to get things done quickly, and boxes get knocked around more than they should.
- Double-box very delicate items – For anything especially fragile, place the packed item in one box, then put that box inside a larger one with padding in between. It adds an extra layer of protection against impact.
Watch temperature and moisture – Electronics and certain materials don’t handle damp or extreme temperatures well. If it’s raining, take a bit of extra care during loading.
Takeaways
- Movement inside the box is the biggest cause of damage – not just drops
- Wrap every fragile item individually and pack tightly
- Always fill empty space to stop items shifting
- Pack plates vertically and glasses upright for better protection
- Good packing matters more than “FRAGILE” labels